尚未鏈接bluno進行測試,在UNO上測試的效果初步完成
詳細制作說明:
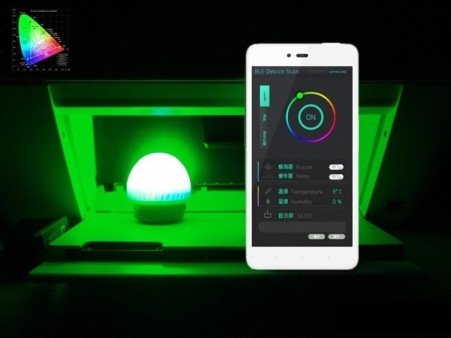
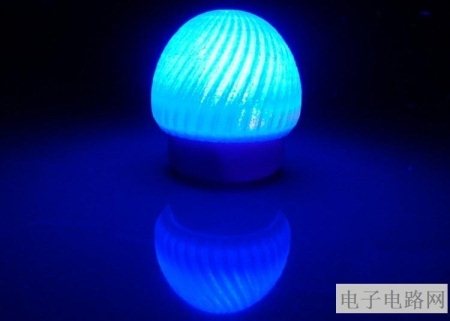
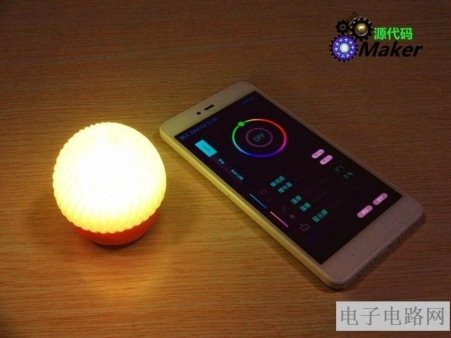
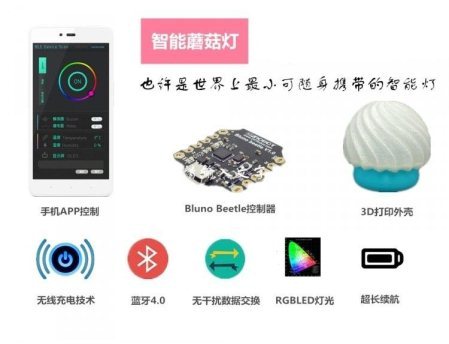
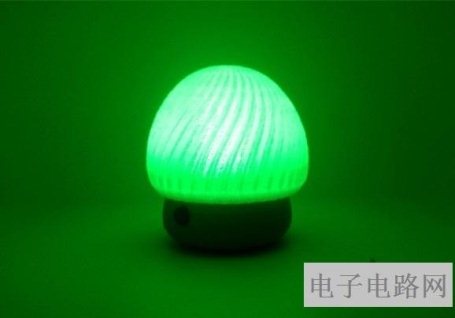
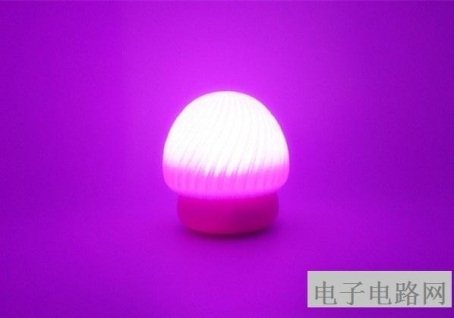
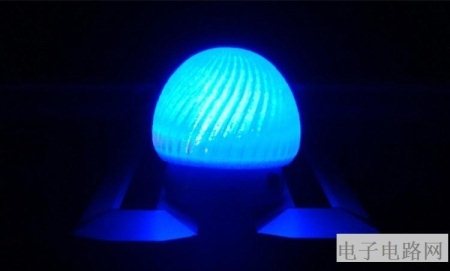
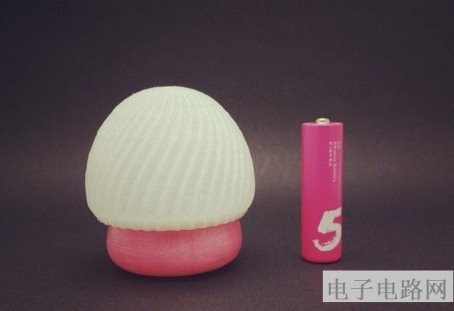
一款智能燈 是注重外形 的設計還是 操作上體 驗呢?而智 能蘑菇燈給 出的答案是 兩者兼具 才 更爽快!特有的無線充電功能讓它可以更方便的進行充電,萌萌的蘑菇機身使用 3DPLA 材 料打印出來,搭載體積小巧的 Bluno Beetle 控制器使它可以用手機 APP 來控制,此外!它的 外形小巧精 致可攜帶也 許是世界上 最小的可攜帶智能燈 了,相信制 作這樣一個 酷炫的蘑 菇 燈,是送給自己心儀女孩子最好的禮物~~話不多說,先看照片!
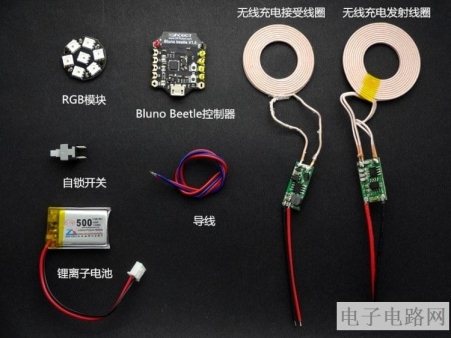
看到照片作為愛動手的你是不是早已饑渴難耐了呢,什么!你說光看照片不過癮?要看教程! 好吧,那就跟我來一起看看這盞酷炫的蘑菇燈是怎樣制作出來的哈哈~~~ 首 先 準 備需要的材料
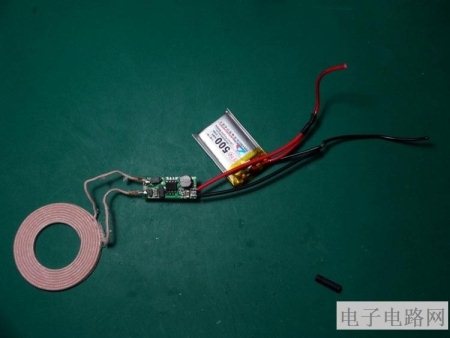
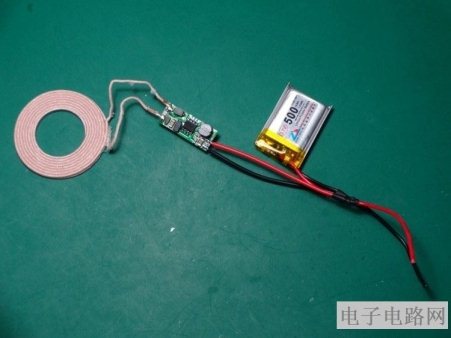
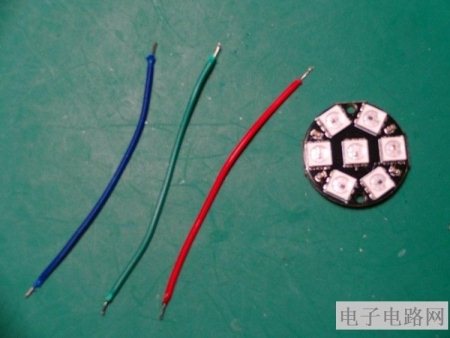
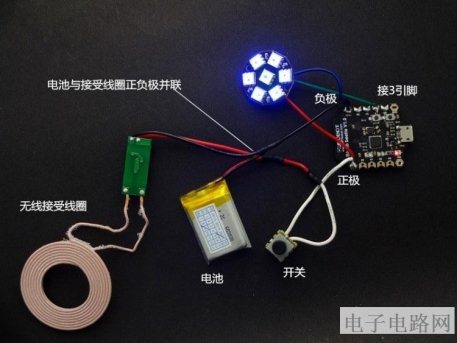
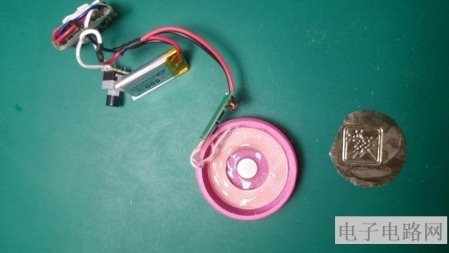
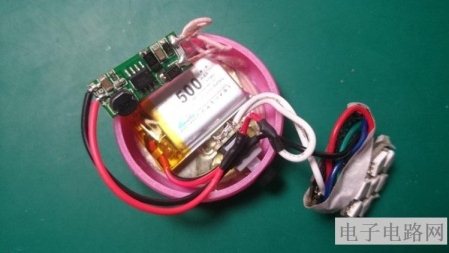
Bluno Beetle 控制器 3D 打印機(打印蘑菇燈) 無線充電模塊 5V/1A 磁環 RGBLED 模塊 220 歐電阻 電池 3.7V 發光二極管 自鎖開關 充電插口 強磁鐵 焊接導線 制作步驟 第一步 蘑菇燈本體制作。 1、將電池與接受線圈并聯焊接,并套上熱縮管絕緣。
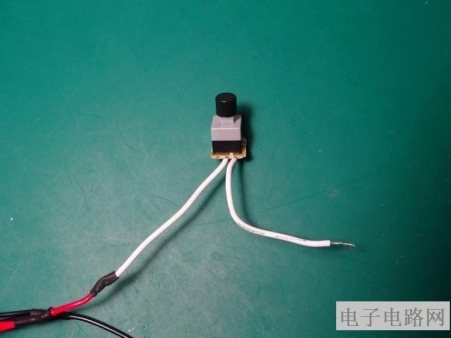
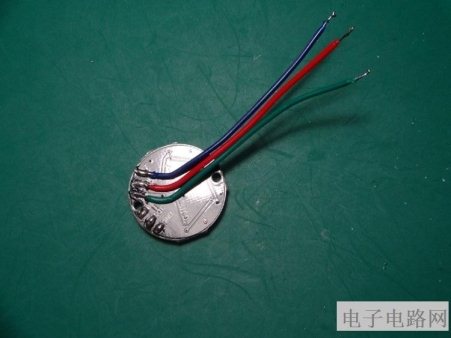
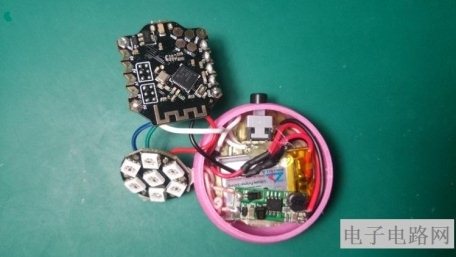
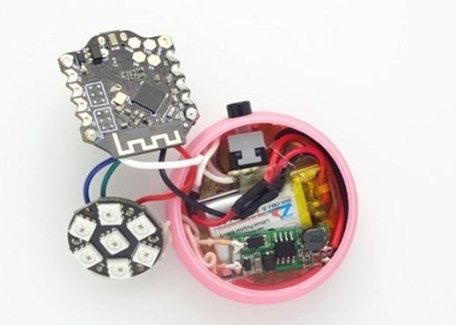
2、焊接自鎖開關引線,焊接 RGB 模塊引線(紅色線焊接 VCC,藍色線焊接 GND,綠色線焊 接 DIN),電池電源正極和 Bluno Beetle 控制器的正極經自鎖開關串聯焊接,RGB 模塊綠色引 線接 Bluno Beetle 控制器數字口 3 引腳,上傳程序到 Bluno Beetle 板然后通電測試電路是否 正常。(程序源碼和需要的庫文件已經上傳至文章結尾,需要請自行下載。)
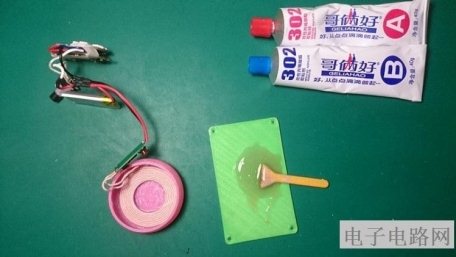
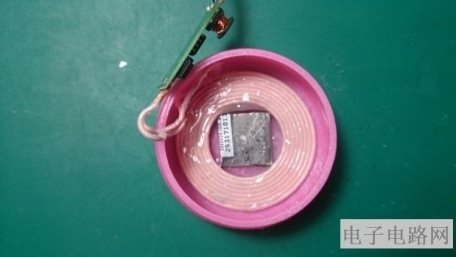
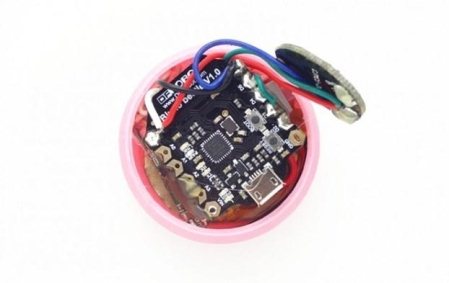
3、安裝控制電路部分,無線充電過程中線圈會發熱,這里用哥倆好膠水固定接收線圈, 同 時加入強磁鐵能更好的與充電發射線圈底座重合定位,考慮到充電過程中如果要控制燈光 , Bluno Beetle 的藍牙信號可能會受到無線充電線圈的電磁干擾,加入不銹鋼鐵片屏蔽電磁干 擾。
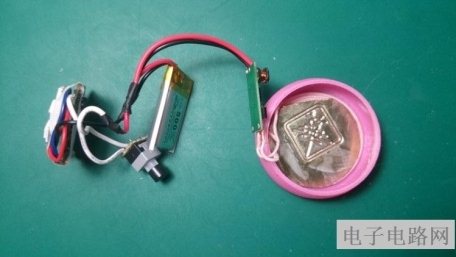
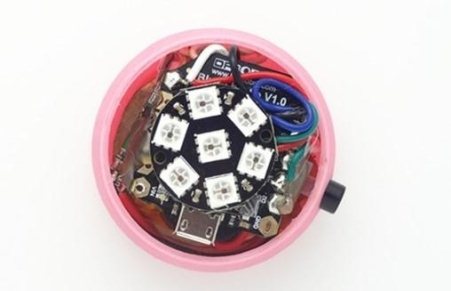
4、待無線接收線圈固定好后,依次放入自鎖開關、電池、Bluno Beetle 控制板、RGB 模塊、 并用熱熔膠將其固定粘接牢固。
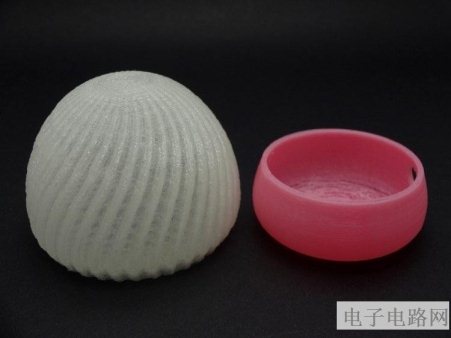
 5、用熱熔膠將蘑菇燈帽和蘑菇燈柱粘接起來,擠出的膠要均勻涂抹,動作干凈利落。
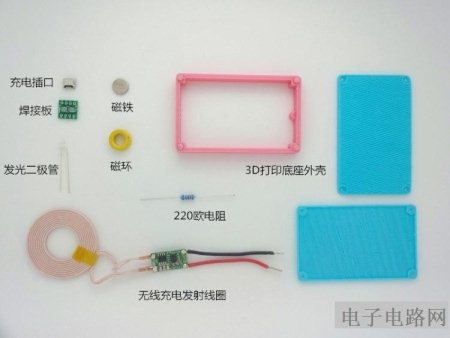
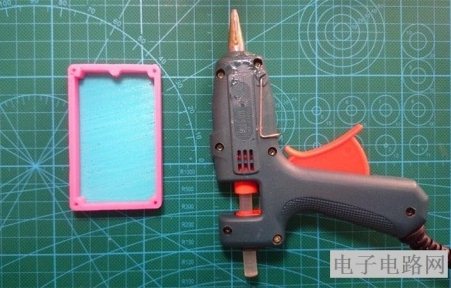
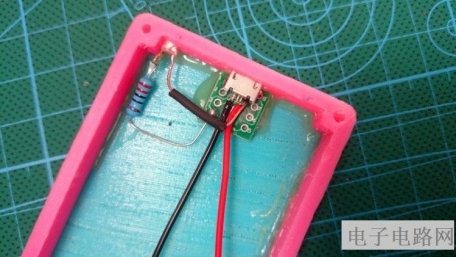
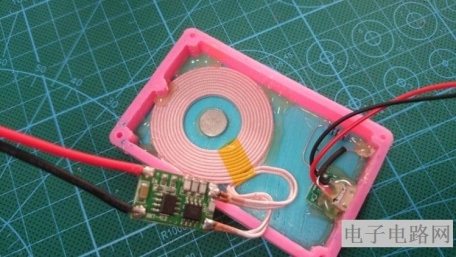
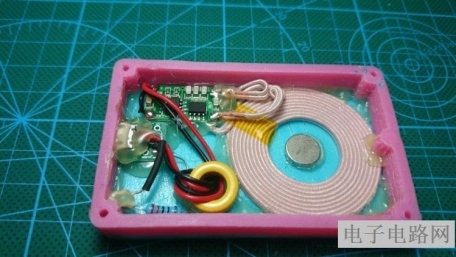
第二步 無線充電底座制作 1、將打印好的底座中框和上蓋組裝好,并用熱熔膠加固。
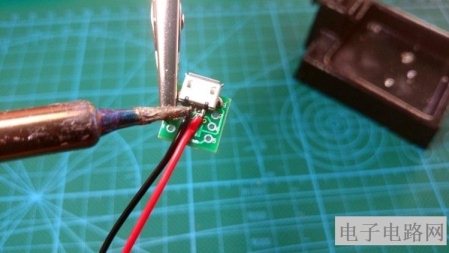
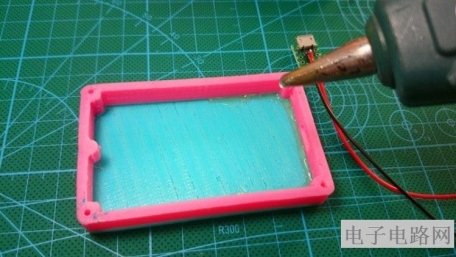
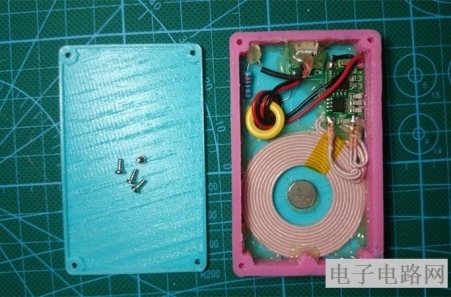
2、焊接充電插口與引線,將充電插口安裝在中框充電接口預留處,用熱熔膠固定。
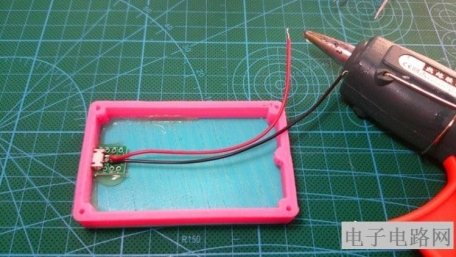
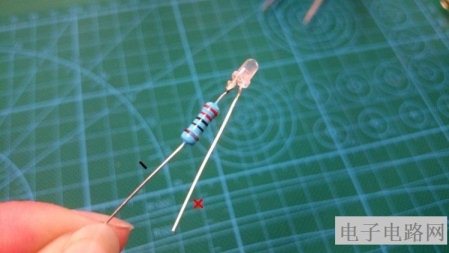
3、在發光二極管的負極接上一個 220 歐的電子,并將二極管正負極與充電接口正負極并聯, 焊接正極時可以用熱縮管絕緣。
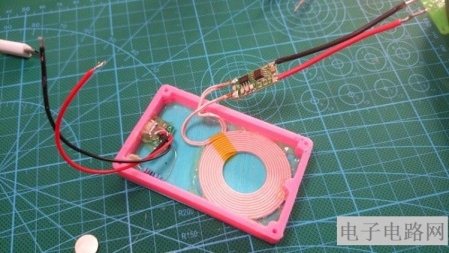
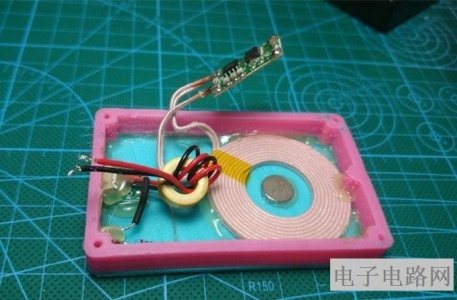
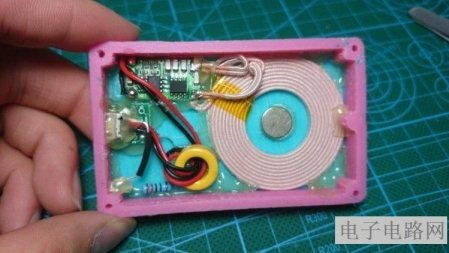
4、將無線充電發射線圈裝入,并用熱熔膠粘合,在發射線圈的中心點粘上強磁鐵,作用 是 與蘑菇燈充電時起到定位作用。
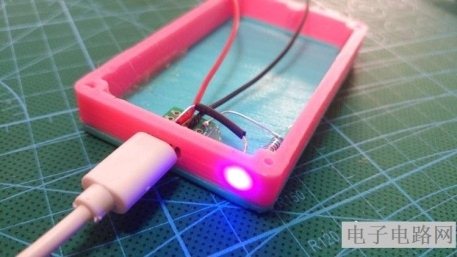
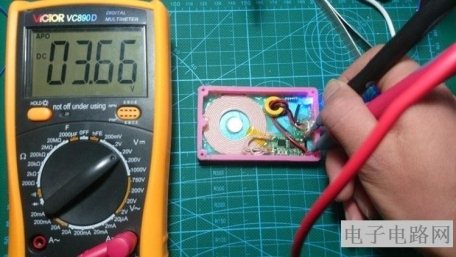
5、加入防干擾磁環,將輸入電源線穿入磁環纏繞兩圈,并將輸入線正負極與發射模塊正 負 極焊接,測量電壓是否正常后用熱熔膠固定。
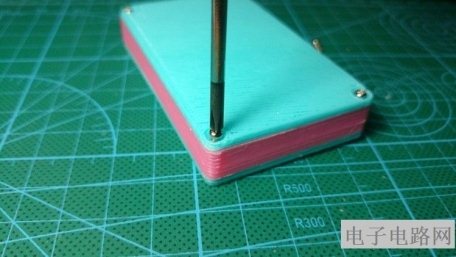
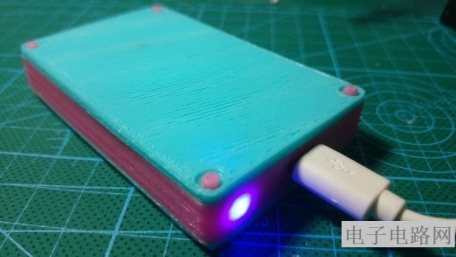
6、準備好螺絲、旋具將充電底座下蓋安裝上,通電測試正常。
最后在手機上安裝 BLUNO APP 控制軟件,項目就算制作完成了。毫無疑問,制作這樣 的智能燈簡單易上手,趕緊造起來吧!一起分享造物的快樂,最后再來看看智能蘑菇燈的更 多照片~~
arduino源程序如下:
- #include <Adafruit_NeoPixel.h>
- #include "WS2812_Definitions.h"
- #include <avr/pgmspace.h>
- #include <Wire.h>
- #include "Arduino.h"
- #include "PlainProtocol.h"
- #include <Metro.h>
- #include <AudioAnalyzer.h>
- #define PIN 3 //Arduino Pin connect to the LED Strip
- #define LED_COUNT 220 //set the Amount of LED to 180 and this number depend on how many you really have
- PlainProtocol BLUNOPlainProtocol(Serial,115200);//set Serial baud rate to 115200
- Adafruit_NeoPixel leds = Adafruit_NeoPixel(LED_COUNT, PIN, NEO_GRB + NEO_KHZ800);// NEO_GRB means the type of your LED Strip
- Metro ledMetro = Metro(18); // Metro for data receive in a regular time
- Analyzer Audio = Analyzer(4,5,0); // Strobe->4 RST->5 Analog->0
- int humid=0;
- int temper=0; // humid and temper means nothing in this program,just for the software in your phone
- int State01=2,State02=0; // the value will change when your press "BUZZER" in your phone
- int Red=10,Green=0,Blue=10,Number_Position_RGB=100;//the value of RGB and the position of the LEDs
- int FreqVal[7];//the spectrum value
- int color[]={0xDC143C,0xFFA500,0xFFFF00, 0x32CD32,0x0000FF,0x2F4F4F,0x4B0082,0xDA70D6};
- int Num_Channel=0,Buff_Channel=0;
- int Num_Color[7],Buff_Num_Color[7];
- boolean Dis_En=false;
- int Num_First_Color=0,Buf_Max=0; //
- int Num_Shark02_High=0,Number_Shark02_LOW=0;
- void setup()
- {
- Audio.Init();//Init module
- leds.begin(); // Call this to start up the LED strip.
- clearLEDs(); // This function, defined below, turns all LEDs off...
- leds.show(); // ...but the LEDs don't actually update until you call this.
- Serial.begin(115200);
- TCCR1B &= ~((1<<CS12)|(1<<CS11)|(1<<CS10)); //Clock select: SYSCLK divde 8;
- TCCR1B |= (1<<CS11);
- TCCR2B &= ~((1<<CS12)|(1<<CS11)|(1<<CS10)); //Clock select: SYSCLK divde 8;
- TCCR2B |= (1<<CS11);
- }
- void loop()
- {
- temper=State01;
- humid=State02;
- if (BLUNOPlainProtocol.available())
- {
- if(BLUNOPlainProtocol.receivedCommand=="TEMP") BLUNOPlainProtocol.write("TEMP", temper);
- else if(BLUNOPlainProtocol.receivedCommand=="HUMID") BLUNOPlainProtocol.write("HUMID", humid);
- if (BLUNOPlainProtocol.receivedCommand=="BUZZER") //get command of "BUZZER"
- {
- if(BLUNOPlainProtocol.receivedContent[0]==1) State01=1;
- else State01=2;
- }
- else if(BLUNOPlainProtocol.receivedCommand=="RGBLED") //get command of "RGB"
- {
- State01=3;
- Red = BLUNOPlainProtocol.receivedContent[0];
- Green= BLUNOPlainProtocol.receivedContent[1];
- Blue = BLUNOPlainProtocol.receivedContent[2];
- }
- }
- if (ledMetro.check() == 1)//time for metro
- {
- if(State01==1)
- {
- clearLEDs(); // Turn off all LEDs
- leds.show();
- }
- else if(State01==2)
- {
- Rock_With_Song();//leds.show();
- }
- else if(State01==3)
- {
- for (int i=0;i<LED_COUNT;i++)
- {
- if(i%7==0)
- leds.setPixelColor(i,Red, Green, 0);//change the color
- else if(i%3==0)
- leds.setPixelColor(i,0, Green, Blue);//change the color
- else if(i%2==0)
- leds.setPixelColor(i,Red, Green, Blue);//change the color
- else
- leds.setPixelColor(i,Red,0, Blue);//change the color
- }
- leds.show();
- }
- }
- }
- void clearLEDs()
- {
- for (int i=0; i<LED_COUNT; i++) leds.setPixelColor(i, 0);
- }
- void rainbow(byte startPosition)
- {
- int rainbowScale = 192/LED_COUNT;
- leds.setPixelColor( startPosition, rainbowOrder((rainbowScale * ( startPosition + startPosition)) % 192));
- leds.show();
- }
- uint32_t rainbowOrder(byte position)
- {
- if (position < 31) // Red -> Yellow (Red = FF, blue = 0, green goes 00-FF)
- {
- return leds.Color(0xFF, position * 8, 0);
- }
- else if (position < 63) // Yellow -> Green (Green = FF, blue = 0, red goes FF->00)
- {
- position -= 31;
- return leds.Color(0xFF - position * 8, 0xFF, 0);
- }
- else if (position < 95) // Green->Aqua (Green = FF, red = 0, blue goes 00->FF)
- {
- position -= 63;
- return leds.Color(0, 0xFF, position * 8);
- }
- else if (position < 127) // Aqua->Blue (Blue = FF, red = 0, green goes FF->00)
- {
- position -= 95;
- return leds.Color(0, 0xFF - position * 8, 0xFF);
- }
- else if (position < 159) // Blue->Fuchsia (Blue = FF, green = 0, red goes 00->FF)
- {
- position -= 127;
- return leds.Color(position * 8, 0, 0xFF);
- }
- else //160 <position< 191 Fuchsia->Red (Red = FF, green = 0, blue goes FF->00)
- {
- position -= 159;
- return leds.Color(0xFF, 0x00, 0xFF - position * 8);
- }
- }
- void Rock_With_Song()
- {
- Buff_Channel=Num_Channel;// Buff_Channnel can store the number of the channel which has the max spectrum value
- Audio.ReadFreq(FreqVal);// get the spectrum value
- for (int i=0;i<6;i++)
- {
- if(FreqVal[Num_Channel]<FreqVal[i]) Num_Channel=i;// get the number of the channel which has the max spectrum value
- Buff_Num_Color[i]=Num_Color[i]; //store the value for the using below
- }
- if(FreqVal[Num_Channel]<400) {
- Number_Shark02_LOW++;
- } //count if a low voice started
- if(Buf_Max!=Num_Channel && FreqVal[Num_Channel]>300) // judge if the sound changed
- {
- Num_First_Color++;
- Dis_En=true; //enable the display
- if(FreqVal[Num_Channel]>400) Number_Shark02_LOW=0; //reset the count of low voice
- if (Num_First_Color==7) Num_First_Color=0; //for recycle
- for(int i=0;i<7;i++) //recycle the colour
- {
- int x=random(0,6);
- if(i==0) Num_Color[i]=Num_First_Color; //recycle the value
- else Num_Color[i]=Buff_Num_Color[x]; //change the color randomly
- }
- }
- Buf_Max=Num_Channel; //store the max_value_channel for next use
- if( (Buf_Max==5 || Buf_Max==4 ) && FreqVal[Buf_Max]>700) //count when the High vlaue of the sound started
- {
- Num_Shark02_High++;
- }
- else Num_Shark02_High=0; //reset the count of the High_value_count
- if(Num_Shark02_High>22) //time of High value voice reached
- {
- for(int i=0;i<LED_COUNT/2;i++) //these are effects of color changing
- {
- leds.setPixelColor(i,rainbowOrder(i)); //rising from two origin points
- leds.setPixelColor(i+LED_COUNT/2,rainbowOrder(i));
- leds.show();
- if(i>LED_COUNT/4) delay(1);
- }
- for(int i=0;i<LED_COUNT/2;i++)
- {
- leds.setPixelColor(LED_COUNT-i,rainbowOrder(i));
- leds.setPixelColor(i+LED_COUNT/2,rainbowOrder(i));
- leds.show();
- }
- for (int i=0;i<LED_COUNT;i++)
- {
- leds.setPixelColor(i,GOLD);
- }
- leds.show();
- Audio.ReadFreq(FreqVal);
- if(FreqVal[4]>800) //if High sound value continues, take another effect out!
- {
- for(int x=0;x<6;x++)
- {
- if(FreqVal[x]>1000)
- {
- for(int y=0;y<LED_COUNT/2;y++) {
- leds.setPixelColor(LED_COUNT-y,RED);
- leds.setPixelColor(LED_COUNT/2-y,RED);
- leds.show();
- }
- x=7;
- }
- }
- }
- Num_Shark02_High=0; //reset the count when effect playing finished
- }
- if(Number_Shark02_LOW>40) //when the time of low value sound reached
- {
- for(int i=0;i<LED_COUNT/2;i++) //close the light from two point
- {
- leds.setPixelColor(i,0);
- leds.setPixelColor(LED_COUNT-i,0);
- leds.show();
- }
- Number_Shark02_LOW=0;
- Dis_En=false; //disable the function:Display() because the light should be closed
- }
- if(Dis_En==true)
- Display();
- }
- void Display()
- {
- for (int i=0;i<LED_COUNT;i++)
- {
- if(i<LED_COUNT/7)
- {
- leds.setPixelColor(i,color[Num_Color[0]]);
- }
- else if(i<(LED_COUNT/7)*2) {
- leds.setPixelColor(i,color[Num_Color[1]]);
- }
- else if(i<(LED_COUNT/7)*3) {
- leds.setPixelColor(i,color[Num_Color[2]]);
- }
- else if(i<(LED_COUNT/7)*4) {
- leds.setPixelColor(i,color[Num_Color[3]]);
- }
- else if(i<(LED_COUNT/7)*5) {
- leds.setPixelColor(i,color[Num_Color[4]]);
- }
- else if(i<(LED_COUNT/7)*6) {
- leds.setPixelColor(i,color[Num_Color[5]]);
- }
- else if(i<LED_COUNT) {
- leds.setPixelColor(i,color[Num_Color[6]]);
- }
- }
- leds.show();
- }

蘑菇外形小燈創意DIY所有相關資源資料51hei提供下載:
 蘑菇燈.zip
(6.88 MB, 下載次數: 40)
蘑菇燈.zip
(6.88 MB, 下載次數: 40)
2017-9-7 17:16 上傳
點擊文件名下載附件
|